> ## Documentation Index
> Fetch the complete documentation index at: https://docs.usesend.com/llms.txt
> Use this file to discover all available pages before exploring further.
# Self hosting with Railway
> Deploy useSend on Railway with one click.
useSend is a [Railway Partner](https://railway.app/partners?utm_medium=integration\&utm_source=docs\&utm_campaign=usesend) and Railway offers the quickest way to get a useSend instance running.
[](https://railway.com/deploy/usesend?utm_medium=integration\&utm_source=docs\&utm_campaign=usesend)
## Prerequisites
* A [GitHub](https://github.com) account
* An [AWS](https://aws.amazon.com) account
If you have any questions join [#self-host](https://discord.gg/gbsvjb9MqV) on discord.
## Step 1: Deploy on Railway
1. Click the button above and choose **Deploy now**.
2. Wait for the deployment to complete and open the service.
3. Note the assigned Railway domain (you can add a custom domain later).
4. You can redeploy from the dashboard anytime to pull the latest image.
## Step 2: Environment variables
useSend depends on AWS SES to send emails and SNS to receive email status. The Railway template provisions Postgres (database) and Redis (queue) automatically—no action needed for those. Add the following variables under your service’s Variables tab.
tl;dr: In the AWS Console, create a new IAM user with programmatic access. Attach `AmazonSNSFullAccess` and `AmazonSESFullAccess`. Then create an access key.
Add the following environment variables in Railway.
```env theme={null}
AWS_ACCESS_KEY_ID=
AWS_SECRET_ACCESS_KEY=
```
Follow this for detailed steps: [Create AWS
credentials](/get-started/create-aws-credentials)
useSend uses GitHub authentication for login.
Use this link to [create a GitHub app](https://docs.github.com/en/apps/creating-github-apps/about-creating-github-apps/about-creating-github-apps)
Callback URL : `https:///api/auth/callback/github`
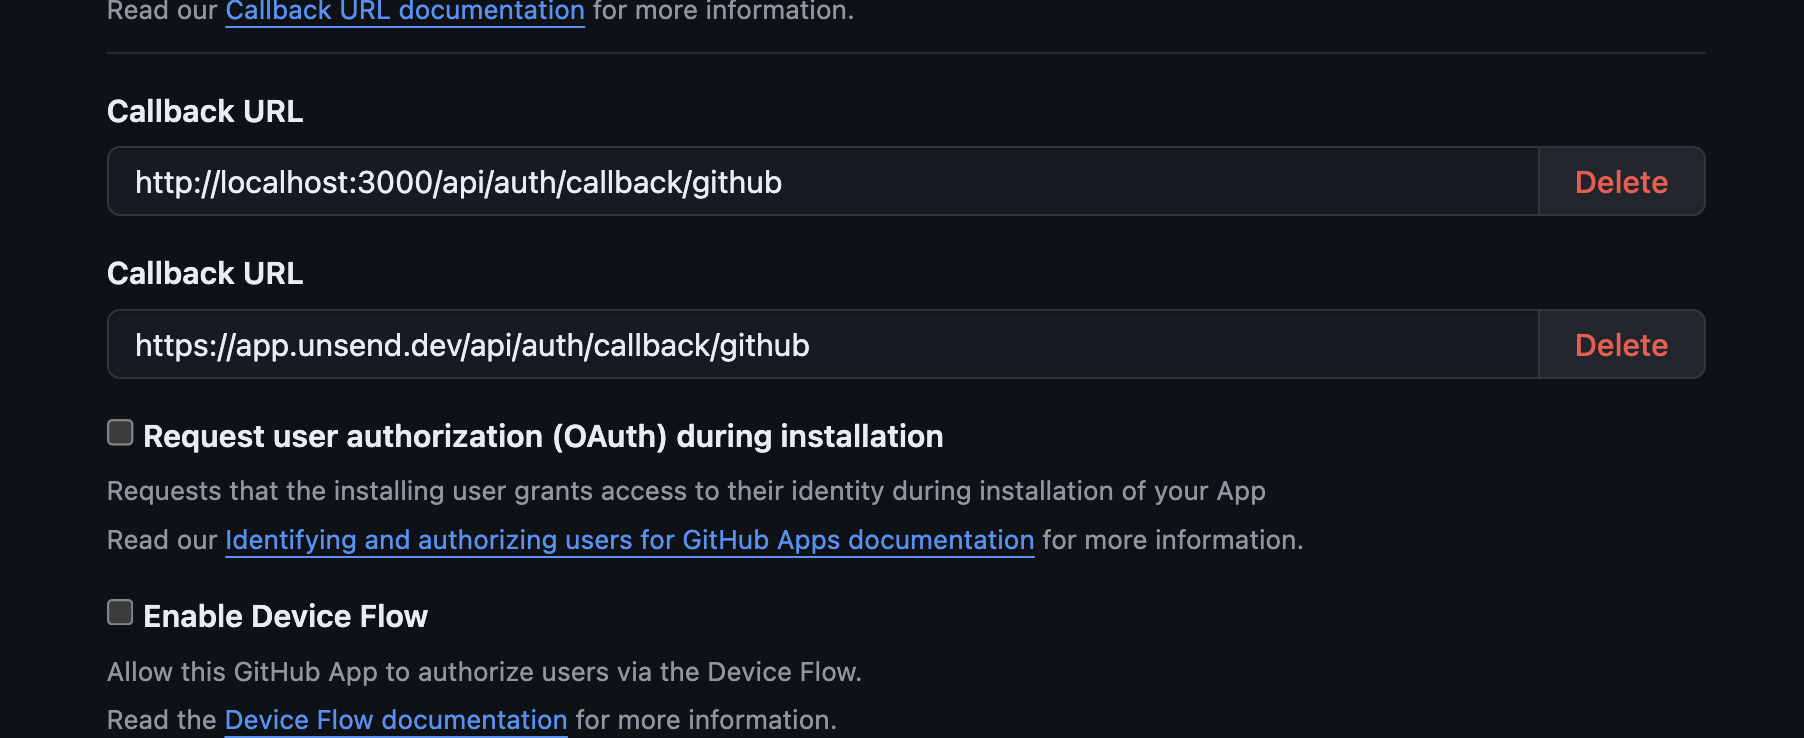 Add the following environment variables in Railway.
```env theme={null}
GITHUB_ID=""
GITHUB_SECRET=""
```
Set your public app URL for NextAuth.
Add the following variables in Railway:
```env theme={null}
NEXTAUTH_URL="https://"
```
After adding variables, click **Redeploy** so the service picks up the new
configuration.
## Step 3: Optional — Custom domain
* Add a custom domain in Railway and configure DNS.
* Update `NEXTAUTH_URL` to your new domain (e.g., `https://mail.yourdomain.com`).
* Redeploy to apply the change.
## Step 4: Set up SES region in useSend
In order to send emails, you need to select a region in AWS. Use a region where your users are located / where useSend is hosted. If you're unsure, use `us-east-1`.
You can check available regions [here](https://docs.aws.amazon.com/general/latest/gr/ses.html)
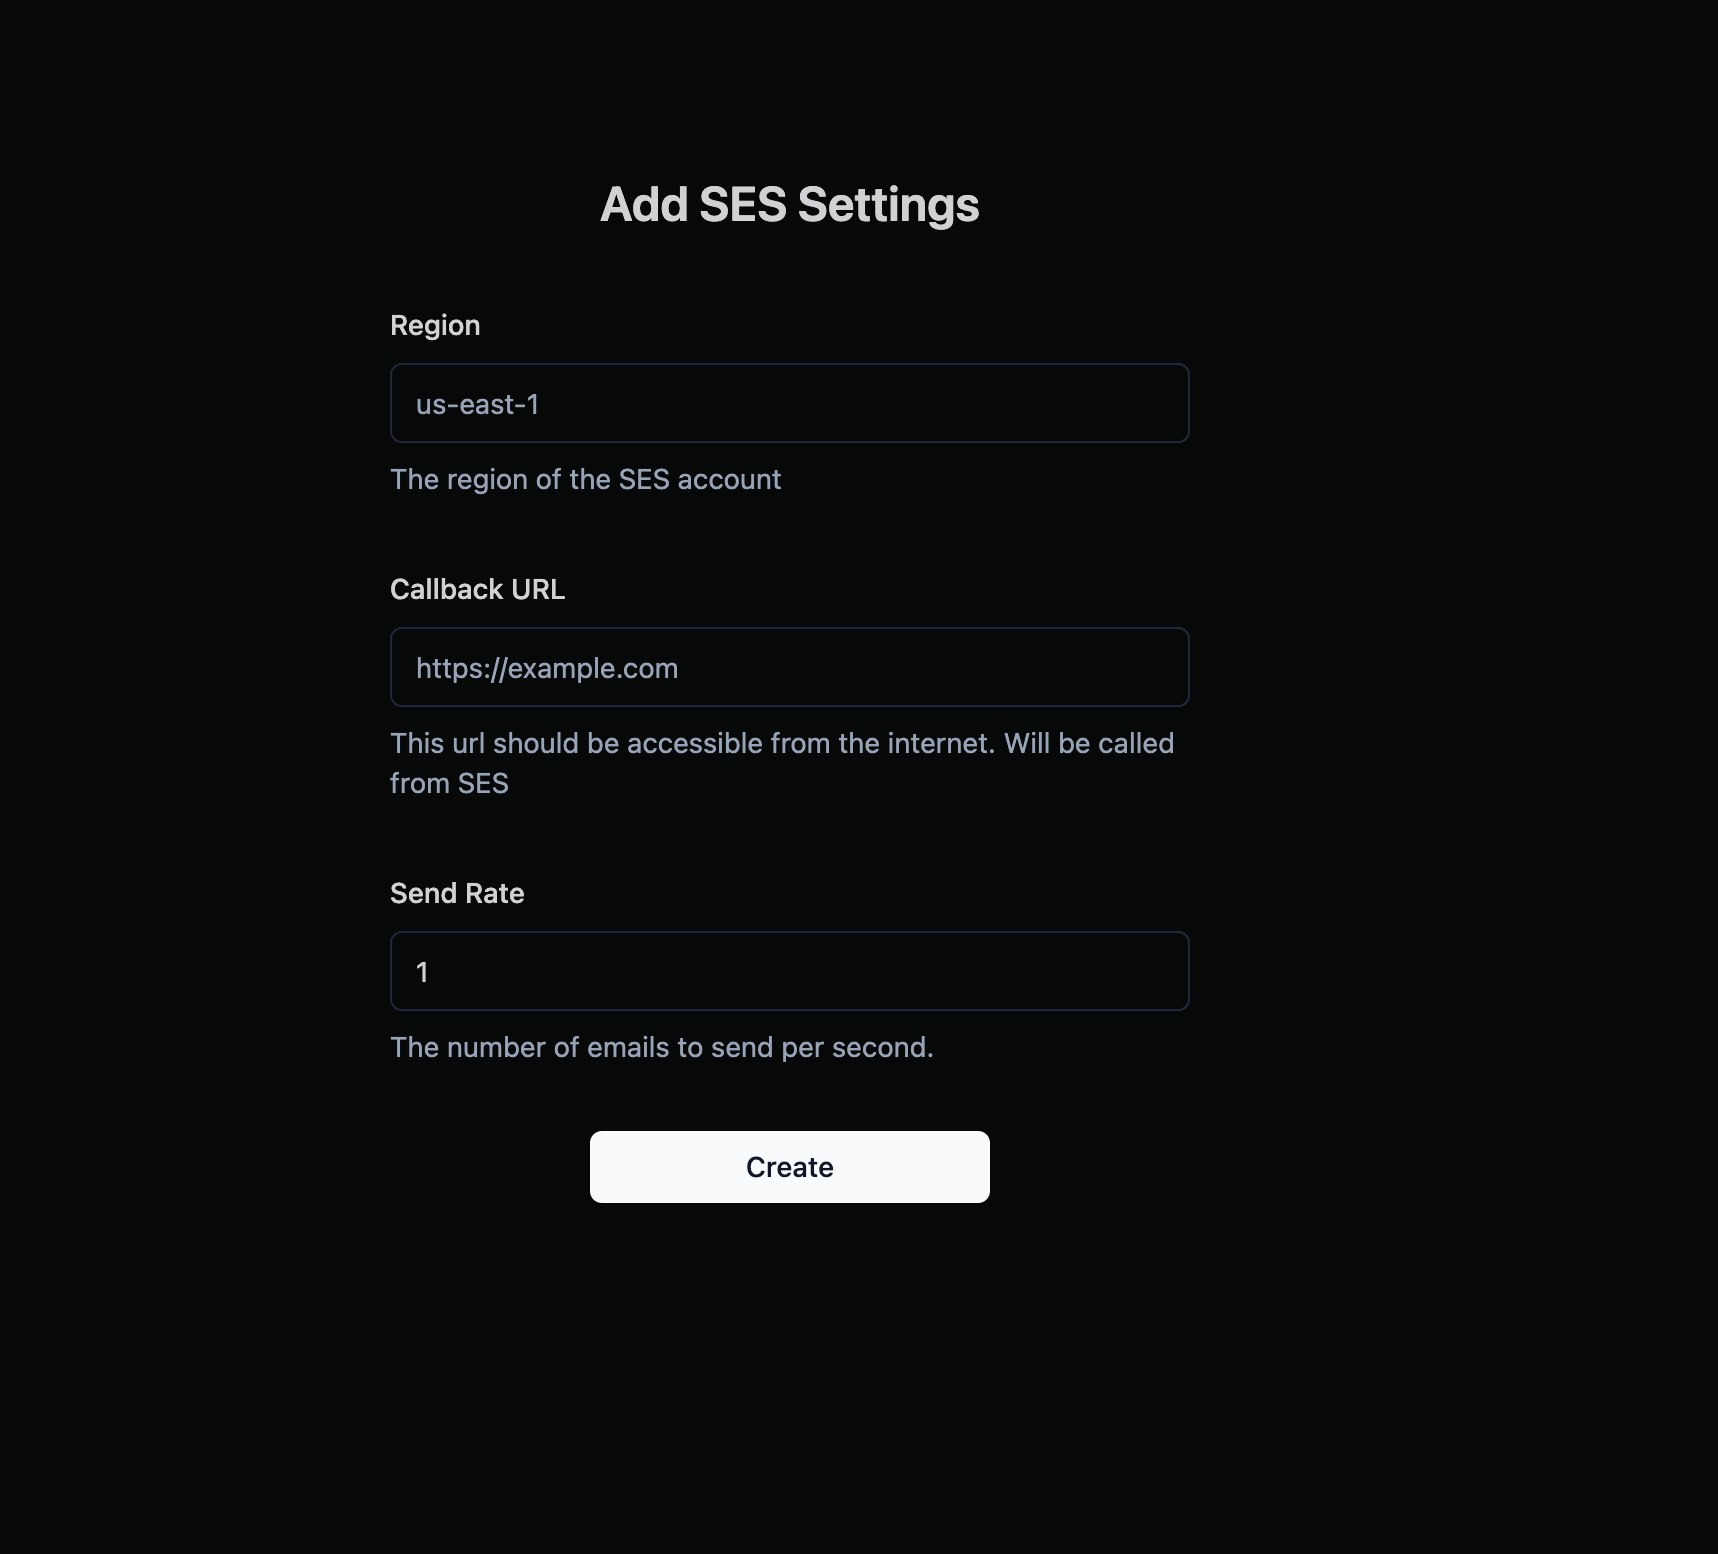
Once you log in to useSend, it will prompt you add SES configuration.
* Add the region
* Add the callback url, which is basically the app url. Note this should be accessible from the internet. This is how you get the delivery status of the emails.
* You don't need to update the send rate, it's automatically based on your account.
Add the following environment variables in Railway.
```env theme={null}
GITHUB_ID=""
GITHUB_SECRET=""
```
Set your public app URL for NextAuth.
Add the following variables in Railway:
```env theme={null}
NEXTAUTH_URL="https://"
```
After adding variables, click **Redeploy** so the service picks up the new
configuration.
## Step 3: Optional — Custom domain
* Add a custom domain in Railway and configure DNS.
* Update `NEXTAUTH_URL` to your new domain (e.g., `https://mail.yourdomain.com`).
* Redeploy to apply the change.
## Step 4: Set up SES region in useSend
In order to send emails, you need to select a region in AWS. Use a region where your users are located / where useSend is hosted. If you're unsure, use `us-east-1`.
You can check available regions [here](https://docs.aws.amazon.com/general/latest/gr/ses.html)
Once you log in to useSend, it will prompt you add SES configuration.
* Add the region
* Add the callback url, which is basically the app url. Note this should be accessible from the internet. This is how you get the delivery status of the emails.
* You don't need to update the send rate, it's automatically based on your account.
 ## Step 5: Get out of SES sandbox
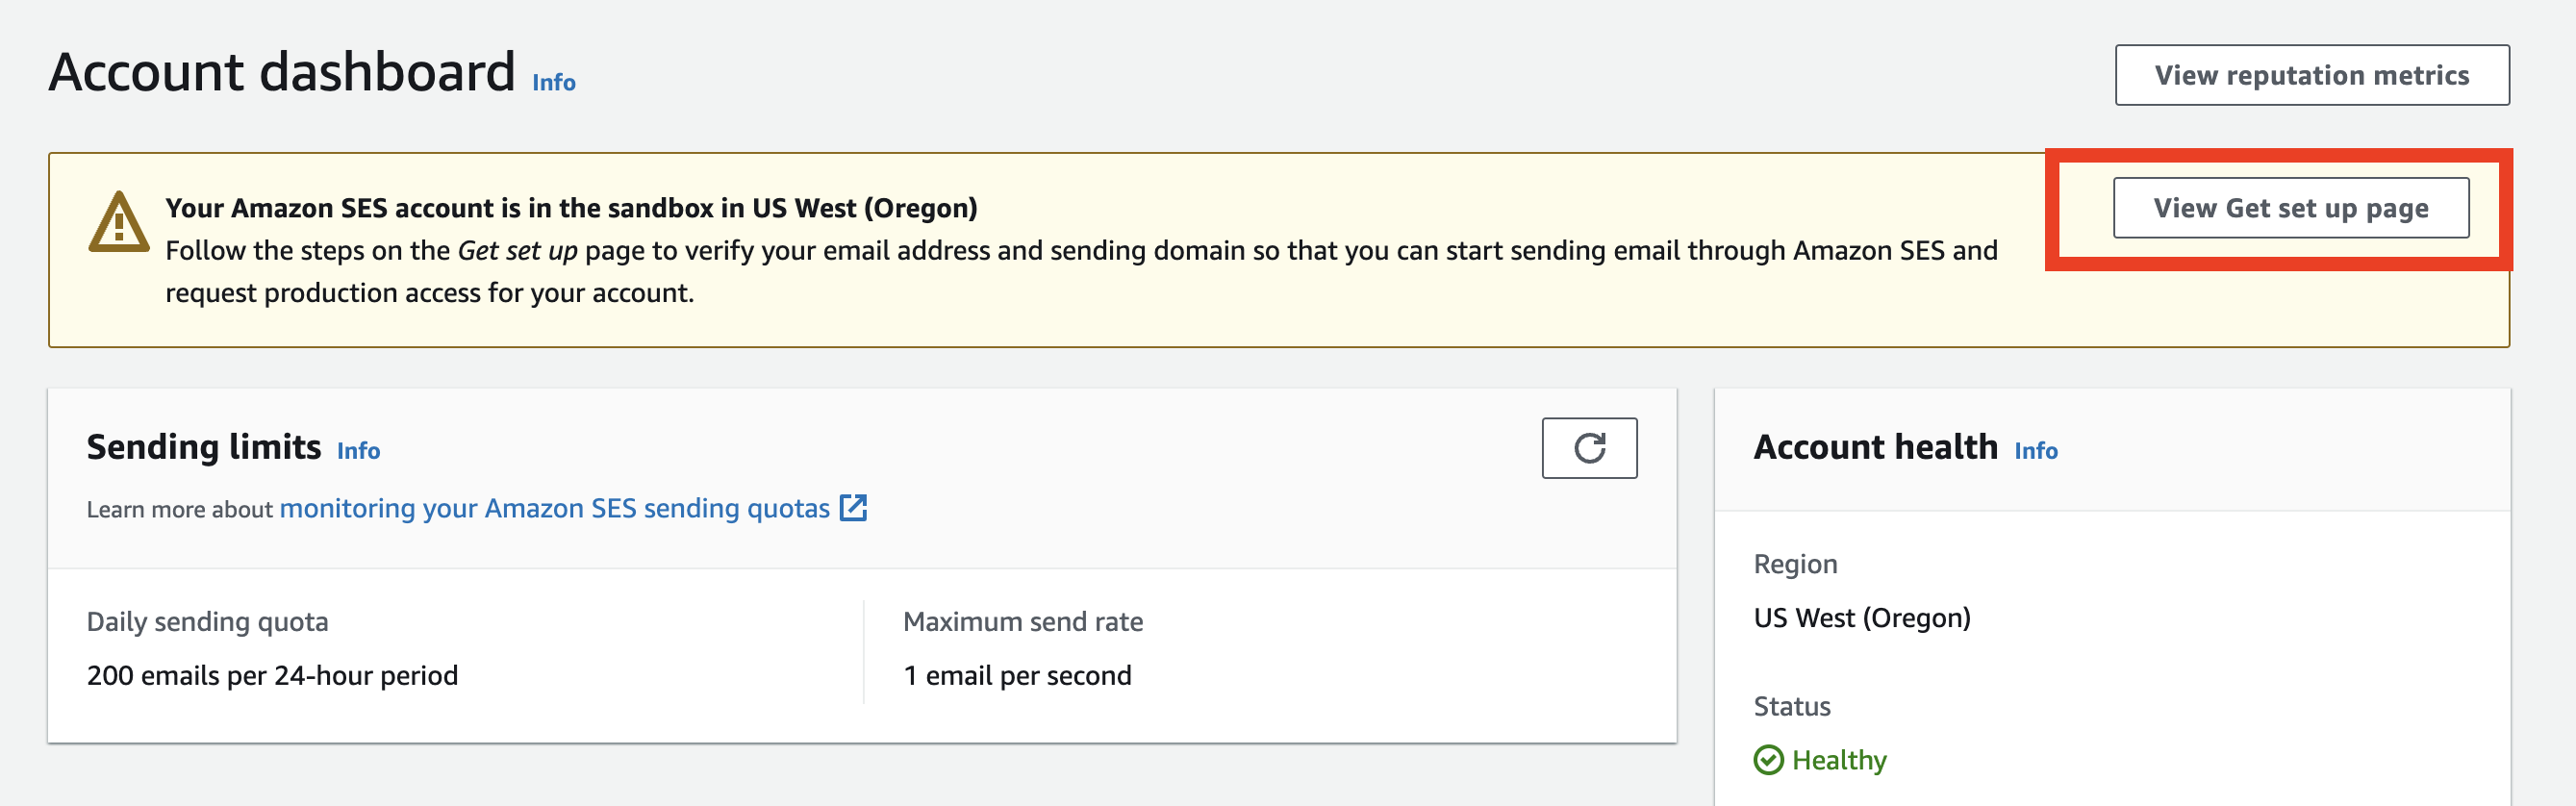
Don't forget to get the SES account out of sandbox mode.
## Step 5: Get out of SES sandbox
Don't forget to get the SES account out of sandbox mode.
 ## Next steps
You're all set up.
* Set up a domain.
* Create an API key.
* Start sending emails.
If you have any questions, please join [#self-host](https://discord.gg/gbsvjb9MqV) on discord.
## Next steps
You're all set up.
* Set up a domain.
* Create an API key.
* Start sending emails.
If you have any questions, please join [#self-host](https://discord.gg/gbsvjb9MqV) on discord.