> ## Documentation Index
> Fetch the complete documentation index at: https://docs.usesend.com/llms.txt
> Use this file to discover all available pages before exploring further.
# Self hosting useSend
> An end-to-end guide on how to self-host useSend. An open-source sending infrastructure for developers.
## Prerequisites
* A [GitHub](https://github.com) account
* An [AWS](https://aws.amazon.com) account
If you have any questions join [#self-host](https://discord.gg/gbsvjb9MqV) on discord.
## Step 1: Environment variables
useSend depends on AWS SES to send emails and SNS to receive email status. Along with that it also depends on Postgres as a database and Redis for queue. Copy the `.env.selfhost.example` file to `.env` and fill in the values.
tl;dr: Login to your AWS console and create a new user with programmatic access. Attach the `AmazonSNSFullAccess` and `AmazonSESFullAccess` policies to the user. Then create a new access key for the user.
Add the following environment variables.
```env theme={null}
AWS_ACCESS_KEY_ID=
AWS_SECRET_ACCESS_KEY=
```
Follow this for detailed steps: [Create AWS
credentials](/get-started/create-aws-credentials)
useSend uses GitHub authentication for login.
Use this link to [create an github app](https://docs.github.com/en/apps/creating-github-apps/about-creating-github-apps/about-creating-github-apps)
Callback URL : `https:///api/auth/callback/github`
Under **Permissions & events**, set **Account permissions → Email addresses**
to **Read-only**. useSend needs the authenticated user's email address to match
new accounts to team invitations.
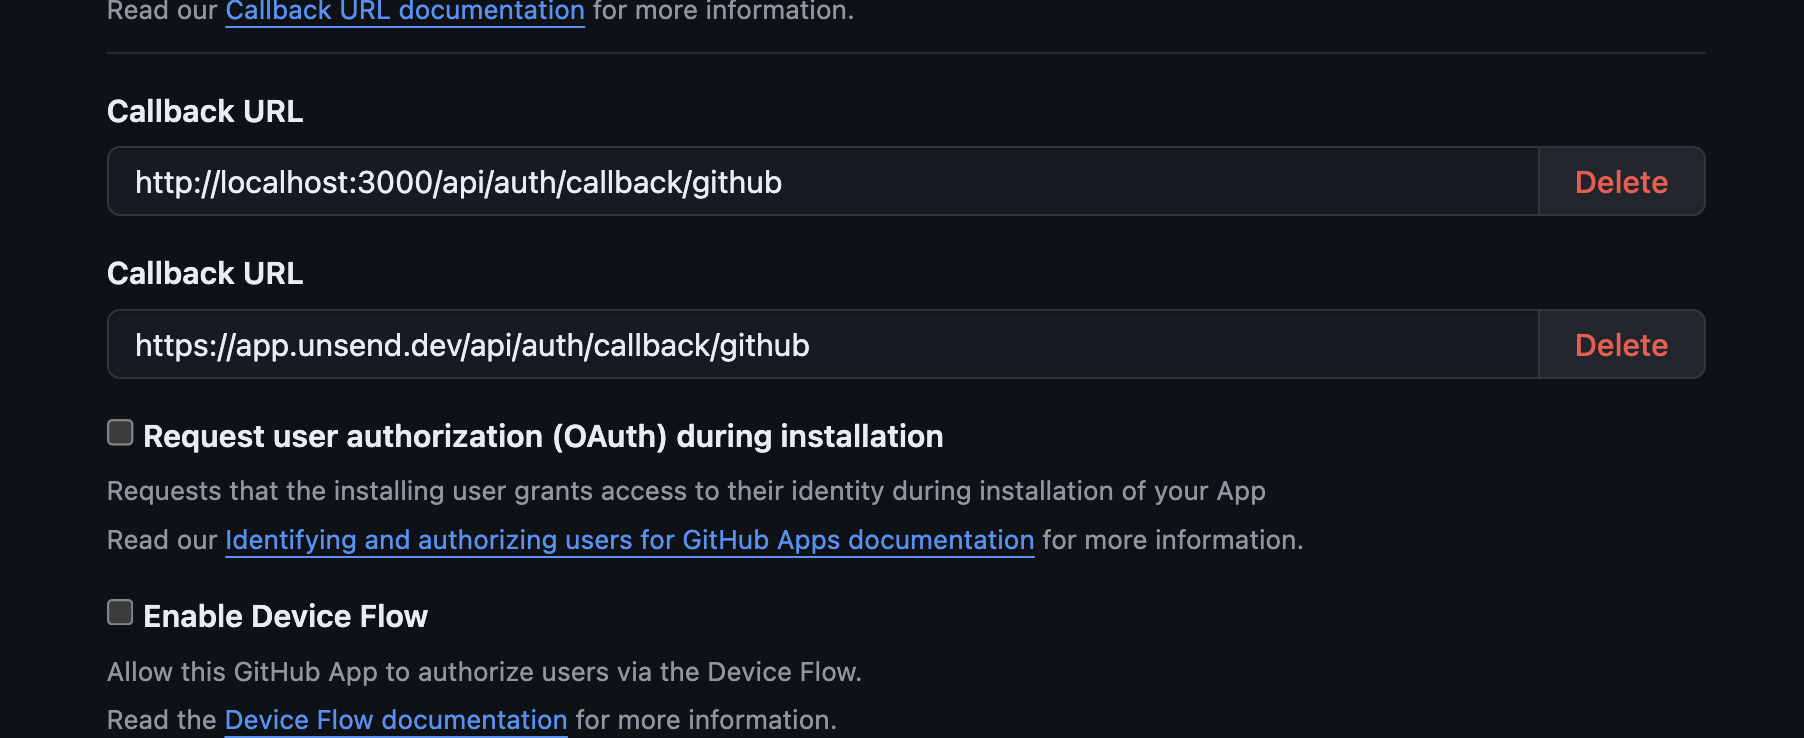 Add the following environment variables.
```env theme={null}
GITHUB_ID=""
GITHUB_SECRET=""
```
If you want email/password login, please help us out with the [code](https://github.com/usesend/usesend)
useSend uses Postgres as a database and Redis as a queue. You need to create a new database and add the following environment variables.
If you're using docker-compose, it's all automatically done for you.
```env theme={null}
DATABASE_URL="postgres://:@:/"
REDIS_URL="redis://:@:"
```
If you're sharing a Redis instance across multiple apps and using Redis ACL for isolation, set `REDIS_KEY_PREFIX` to namespace all keys (e.g. `REDIS_KEY_PREFIX="usesend"` prefixes all keys with `usesend:`).
Url is the app url you're going to use and secret is random string. You can generate a random secret using this command.
```sh theme={null}
openssl rand -base64 32
```
Add the following environment variables.
```env theme={null}
NEXTAUTH_URL="https://"
NEXTAUTH_SECRET=""
```
## Step 2: Setting up the app
You can use any platform that supports Docker to host useSend. If you have any questions drop in the [discord channel](https://discord.gg/gbsvjb9MqV) and we'll try to help you out.
### Docker
Follow this guide to setup your docker instance: [Set up docker](/get-started/set-up-docker)
[](https://hub.docker.com/r/usesend/usesend)
## Step 3: Setting up a region
In order to send emails, you need to select a region in AWS. Use a region where your users are located / where useSend is hosted. If you're confused just use `us-east-1`.
You can check available regions [here](https://docs.aws.amazon.com/general/latest/gr/ses.html)
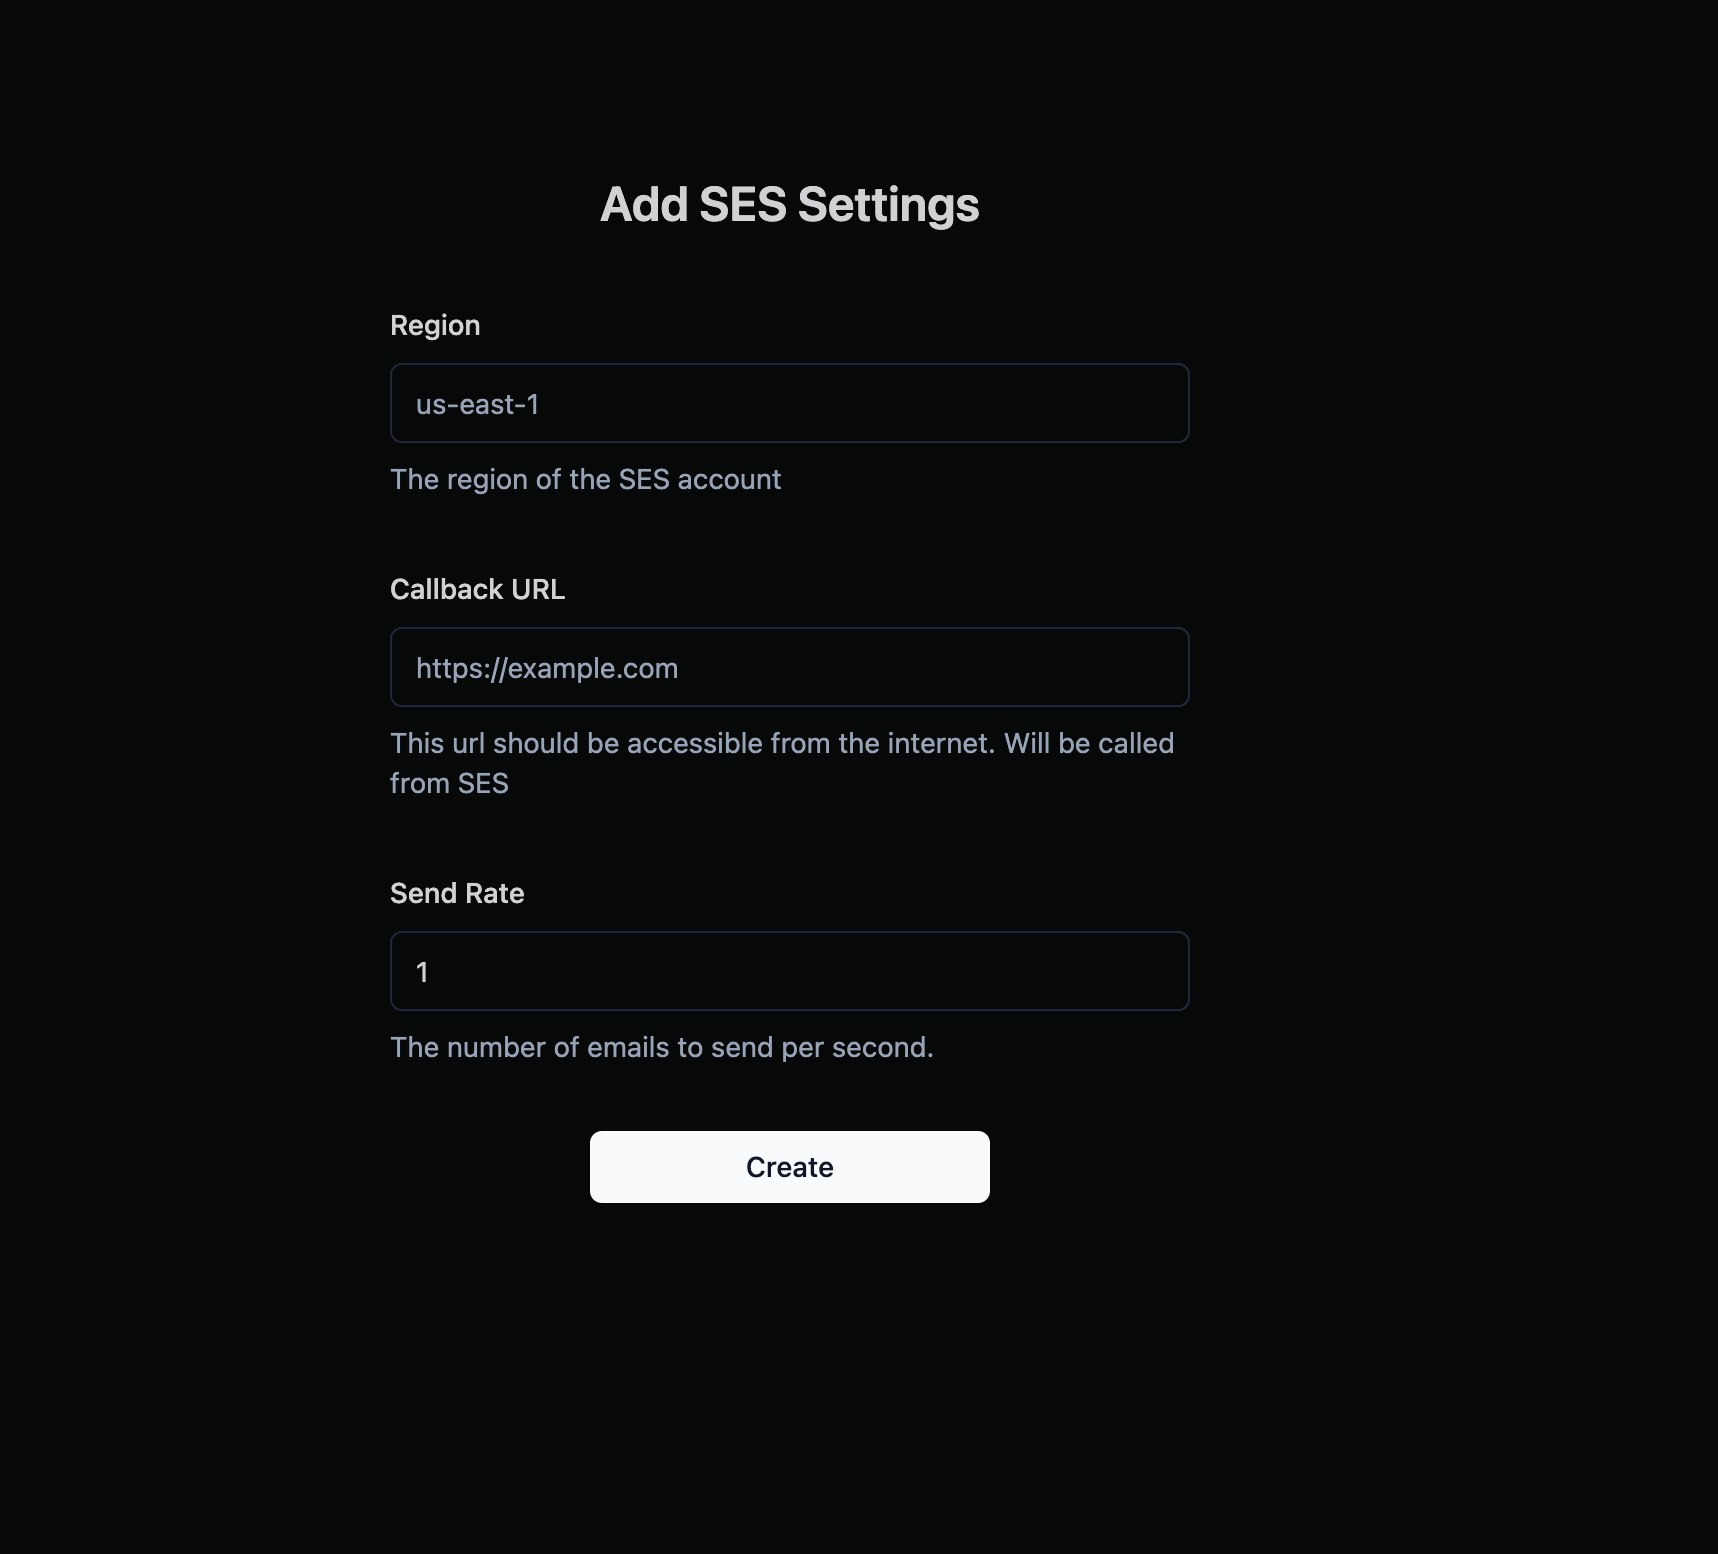
Once you log in to useSend, it will prompt you add SES configuration.
* Add the region
* Add the callback url, which is basically the app url. Note this should be accesible from internet. This is how you get the delivery status of the emails.
* You don't need to update the send rate, it's automatically based on your account.
Add the following environment variables.
```env theme={null}
GITHUB_ID=""
GITHUB_SECRET=""
```
If you want email/password login, please help us out with the [code](https://github.com/usesend/usesend)
useSend uses Postgres as a database and Redis as a queue. You need to create a new database and add the following environment variables.
If you're using docker-compose, it's all automatically done for you.
```env theme={null}
DATABASE_URL="postgres://:@:/"
REDIS_URL="redis://:@:"
```
If you're sharing a Redis instance across multiple apps and using Redis ACL for isolation, set `REDIS_KEY_PREFIX` to namespace all keys (e.g. `REDIS_KEY_PREFIX="usesend"` prefixes all keys with `usesend:`).
Url is the app url you're going to use and secret is random string. You can generate a random secret using this command.
```sh theme={null}
openssl rand -base64 32
```
Add the following environment variables.
```env theme={null}
NEXTAUTH_URL="https://"
NEXTAUTH_SECRET=""
```
## Step 2: Setting up the app
You can use any platform that supports Docker to host useSend. If you have any questions drop in the [discord channel](https://discord.gg/gbsvjb9MqV) and we'll try to help you out.
### Docker
Follow this guide to setup your docker instance: [Set up docker](/get-started/set-up-docker)
[](https://hub.docker.com/r/usesend/usesend)
## Step 3: Setting up a region
In order to send emails, you need to select a region in AWS. Use a region where your users are located / where useSend is hosted. If you're confused just use `us-east-1`.
You can check available regions [here](https://docs.aws.amazon.com/general/latest/gr/ses.html)
Once you log in to useSend, it will prompt you add SES configuration.
* Add the region
* Add the callback url, which is basically the app url. Note this should be accesible from internet. This is how you get the delivery status of the emails.
* You don't need to update the send rate, it's automatically based on your account.
 ## Step 4: Getting out of sandbox mode
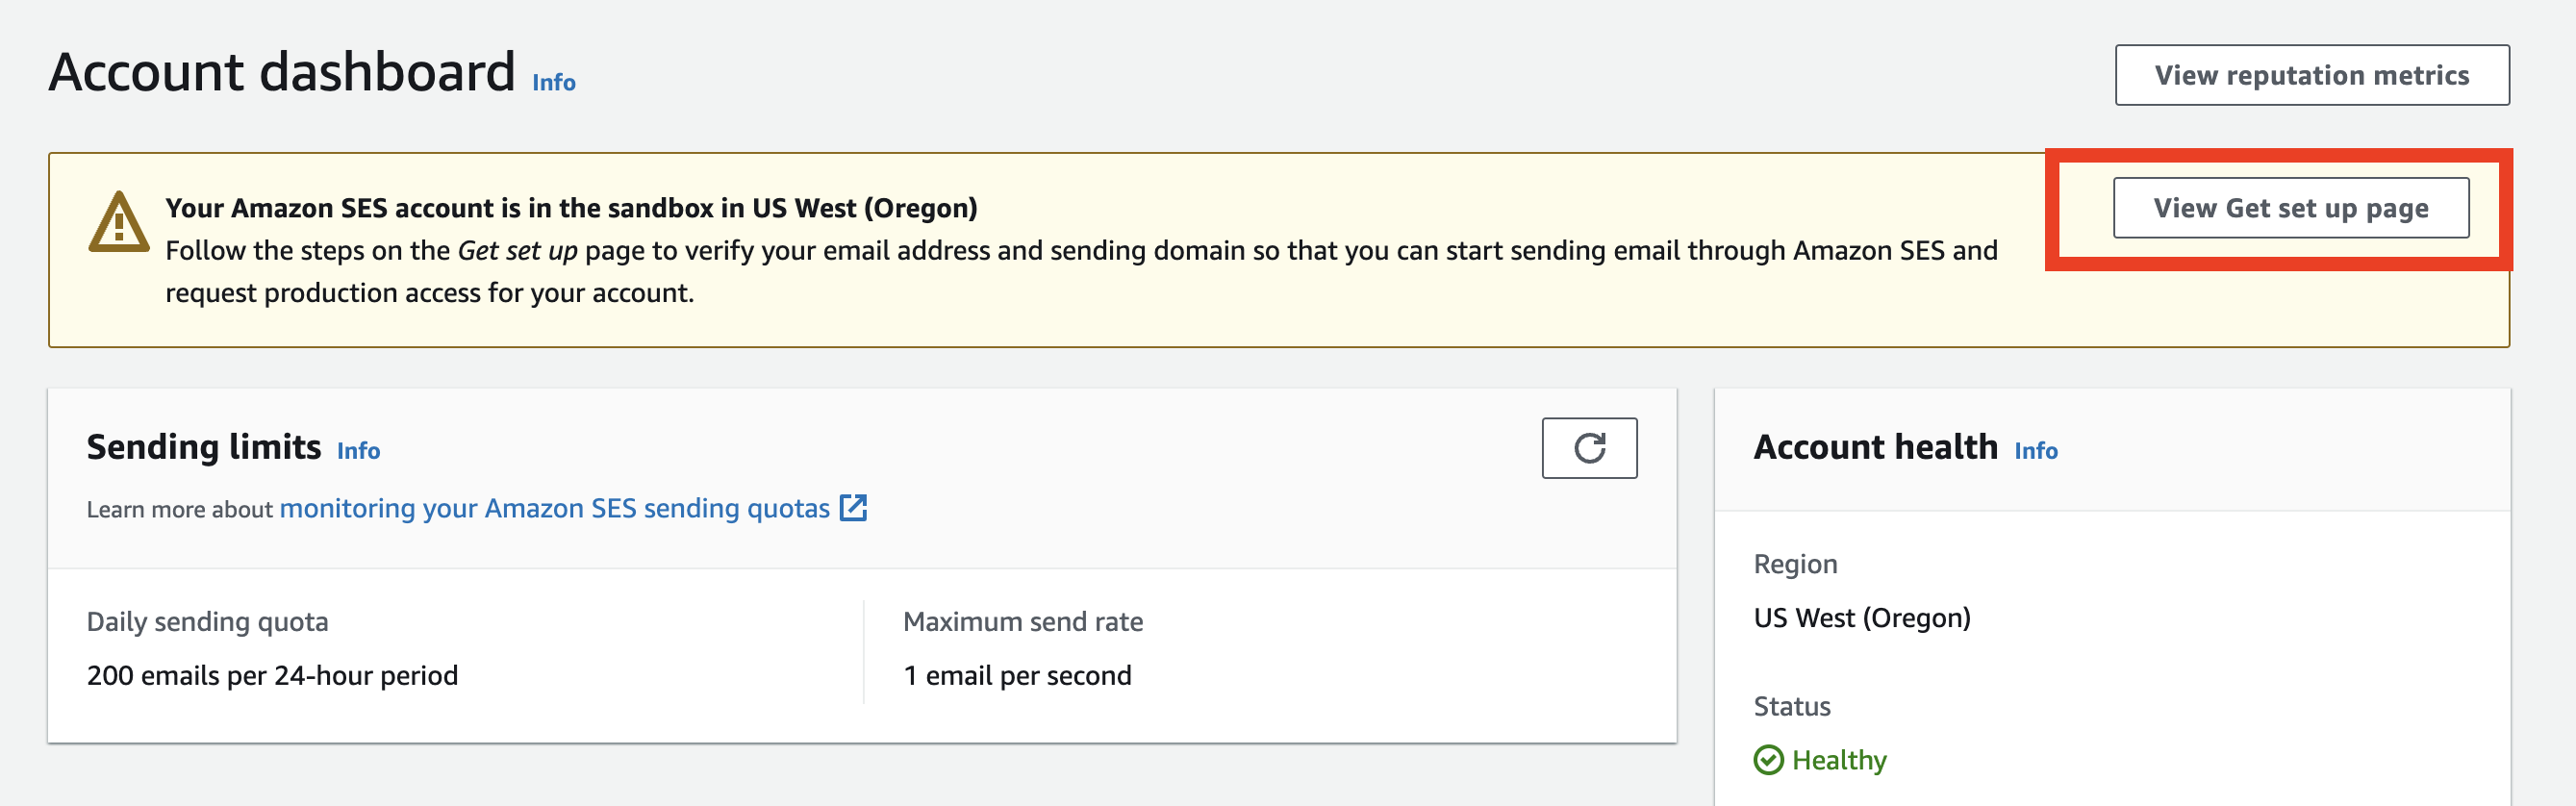
Don't forget to get the SES account out of sandbox mode.
## Step 4: Getting out of sandbox mode
Don't forget to get the SES account out of sandbox mode.
 ## Step 5: SMTP Proxy Server (Optional)
The SMTP proxy server is an optional component that allows applications to send emails through useSend using standard SMTP protocol instead of the REST API. This is useful for legacy applications, email clients, or any software that needs to send emails via SMTP.
The complete source code for the SMTP proxy server is available at:
[usesend/usesend/tree/main/apps/smtp-server](https://github.com/usesend/usesend/tree/main/apps/smtp-server)
### When to use the SMTP proxy:
* **Legacy applications** that only support SMTP
* **Email clients** like Thunderbird, Outlook, Apple Mail
* **Applications** that can't easily integrate with REST APIs
* **Third-party software** that requires SMTP configuration
### Docker Compose Setup
Create a `docker-compose.yml` file for the SMTP server:
```yaml theme={null}
name: usesend-smtp-server
services:
smtp-server:
container_name: usesend-smtp-server
image: usesend/smtp-proxy:latest
environment:
SMTP_AUTH_USERNAME: "usesend" # Username for SMTP authentication
USESEND_BASE_URL: "https://your-usesend-instance.com" # Your useSend instance URL
# Optional: SSL certificate paths for secure connections
# USESEND_API_KEY_PATH: "/certs/server.key"
# USESEND_API_CERT_PATH: "/certs/server.crt"
# Optional: Mount SSL certificates
# volumes:
# - ./certs/server.key:/certs/server.key:ro
# - ./certs/server.crt:/certs/server.crt:ro
ports:
- "25:25" # Standard SMTP
- "587:587" # SMTP with STARTTLS
- "2587:2587" # Alternative SMTP port
- "465:465" # SMTP over SSL/TLS
- "2465:2465" # Alternative SMTPS port
restart: unless-stopped
```
Run the SMTP server:
```bash theme={null}
docker-compose up -d
```
### SMTP Configuration
To send emails through the proxy, configure your application with these SMTP settings:
* **Host**: Your server's IP address or domain
* **Ports**: 25, 587 (STARTTLS), 465 (SSL/TLS), 2587, or 2465
* **Username**: `usesend` (or your custom `SMTP_AUTH_USERNAME`)
* **Password**: Your useSend API key
* **Encryption**: STARTTLS (ports 25, 587, 2587) or SSL/TLS (ports 465, 2465)
The SMTP proxy forwards all emails to your useSend instance, so make sure your
main useSend application is running and accessible.
Ensure your firewall allows traffic on the SMTP ports you're using. For
production deployments, consider using non-standard ports (2587, 2465) to
avoid conflicts.
## Next steps
You're all set up now.
* Setup a domain.
* Create an API key.
* Start sending emails.
If you have any questions, please join [#self-host](https://discord.gg/gbsvjb9MqV) on discord.
A community member shared a short write-up on hosting useSend with
[Coolify](https://mattstein.com/thoughts/coolify-unsend/). Give it a read if
you need another reference.
## Step 5: SMTP Proxy Server (Optional)
The SMTP proxy server is an optional component that allows applications to send emails through useSend using standard SMTP protocol instead of the REST API. This is useful for legacy applications, email clients, or any software that needs to send emails via SMTP.
The complete source code for the SMTP proxy server is available at:
[usesend/usesend/tree/main/apps/smtp-server](https://github.com/usesend/usesend/tree/main/apps/smtp-server)
### When to use the SMTP proxy:
* **Legacy applications** that only support SMTP
* **Email clients** like Thunderbird, Outlook, Apple Mail
* **Applications** that can't easily integrate with REST APIs
* **Third-party software** that requires SMTP configuration
### Docker Compose Setup
Create a `docker-compose.yml` file for the SMTP server:
```yaml theme={null}
name: usesend-smtp-server
services:
smtp-server:
container_name: usesend-smtp-server
image: usesend/smtp-proxy:latest
environment:
SMTP_AUTH_USERNAME: "usesend" # Username for SMTP authentication
USESEND_BASE_URL: "https://your-usesend-instance.com" # Your useSend instance URL
# Optional: SSL certificate paths for secure connections
# USESEND_API_KEY_PATH: "/certs/server.key"
# USESEND_API_CERT_PATH: "/certs/server.crt"
# Optional: Mount SSL certificates
# volumes:
# - ./certs/server.key:/certs/server.key:ro
# - ./certs/server.crt:/certs/server.crt:ro
ports:
- "25:25" # Standard SMTP
- "587:587" # SMTP with STARTTLS
- "2587:2587" # Alternative SMTP port
- "465:465" # SMTP over SSL/TLS
- "2465:2465" # Alternative SMTPS port
restart: unless-stopped
```
Run the SMTP server:
```bash theme={null}
docker-compose up -d
```
### SMTP Configuration
To send emails through the proxy, configure your application with these SMTP settings:
* **Host**: Your server's IP address or domain
* **Ports**: 25, 587 (STARTTLS), 465 (SSL/TLS), 2587, or 2465
* **Username**: `usesend` (or your custom `SMTP_AUTH_USERNAME`)
* **Password**: Your useSend API key
* **Encryption**: STARTTLS (ports 25, 587, 2587) or SSL/TLS (ports 465, 2465)
The SMTP proxy forwards all emails to your useSend instance, so make sure your
main useSend application is running and accessible.
Ensure your firewall allows traffic on the SMTP ports you're using. For
production deployments, consider using non-standard ports (2587, 2465) to
avoid conflicts.
## Next steps
You're all set up now.
* Setup a domain.
* Create an API key.
* Start sending emails.
If you have any questions, please join [#self-host](https://discord.gg/gbsvjb9MqV) on discord.
A community member shared a short write-up on hosting useSend with
[Coolify](https://mattstein.com/thoughts/coolify-unsend/). Give it a read if
you need another reference.